How to draw an image as circle?

:information_source: Attention Topic was automatically imported from the old Question2Answer platform.
:bust_in_silhouette: Asked By arun_mani_j

Hello all.
I have an image and I would like to use it as texture for a circular node. How do I do it?
There is CanvasItem.draw_circle method but it draws a circle filled with a single color.

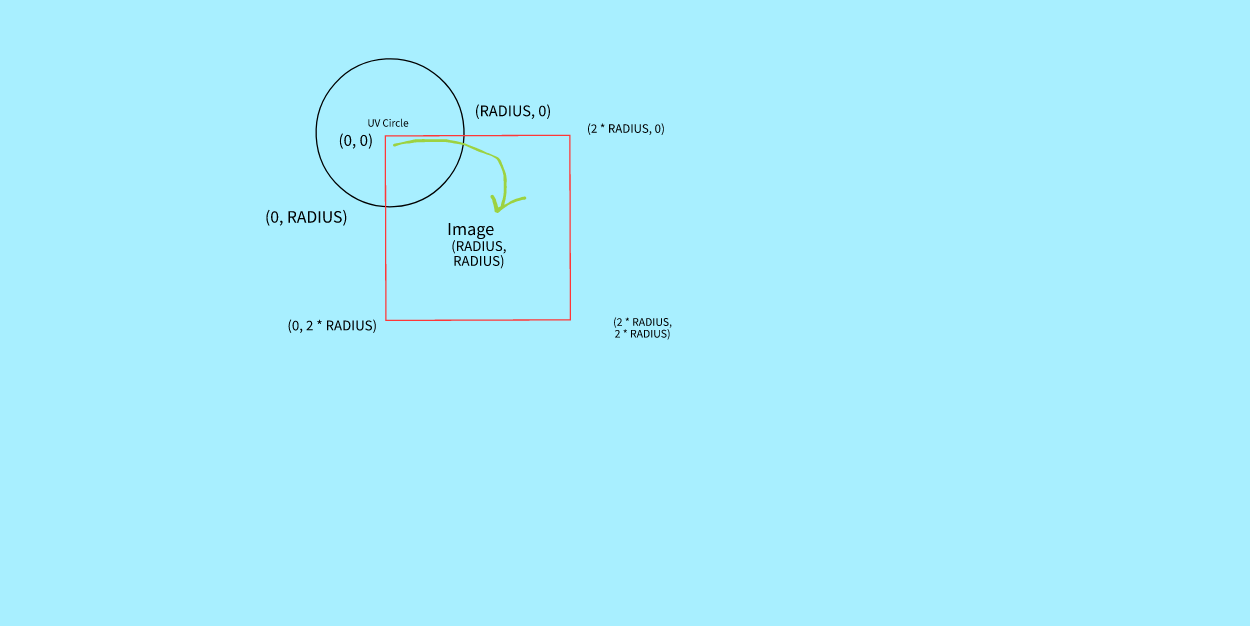
What I need is, provided an image, I should be able to draw it as a circle. This image is dynamic.

The only solution I could think of so far is to use an external program like ImageMagick to convert the image to a circular image and then use it as a texture.

convert -size 200x200 xc:none -fill walter.jpg -draw "circle 100,100 100,1" circle_thumb.png

But this creates an extra dependency. Please share your thoughts and ideas that helps me achieve this through Godot itself. :slight_smile:

Images are rectangular in nature. While that ImageMagick command may produce a visually circular image, the result is just a PNG file, which will contain a rectangular image definition.

With that in mind, it’d be helpful to know what you want to happen to the pixels that are “outside” of your circular boundary. Should they be drawn in some pre-defined color (black maybe?) or be completely transparent, or something else?

I believe you should be able to reproduce any reasonable combination of the above using Godot’s built-in image and pixel processing capabilities - it just depends on the goal.

jgodfrey | 2023-04-26 16:55

Yes, ImageMagick produces rectangular image with a cropped circle such that the region outside the circle is transparent. I want to replicate the same :slight_smile:

arun_mani_j | 2023-04-27 01:45

:bust_in_silhouette: Reply From: TRAILtheGREAT

I just did something similar for my own game, though mine is in 3D, but I think the same principal might still work. I used blender to create a circle with a hole in the center, then edited the UVs so that they form a square, such that mapping the UVs to the mesh can be seen as taking the square UVs and wrapping them around into a flat donut. Then I shrunk the hole in the center until it was too small to see. Then I could apply any image I wanted and it would be warped into a circle. I could even animate the UVs with a shader to make it spin or pulse.

Again, this works in 3D, but the 2D engine can’t display a 3D mesh directly, fortunately this tutorial looks like might have some ways to apply this to 2D.

Can you share an example of the technique? ^^ If I understand correctly, I should be able to achieve the same by creating a circle in Blender and import it in Godot and then apply textures to it dynamically?

arun_mani_j | 2023-04-27 01:49

image
Here’s a screenshot of my mesh in blender with the UVs on the right. the top row of verts are the outer ring on the mesh, and the the bottom row are the inner ring, which is really small.

Again, this works in 3d, but it sounds like your project is 2D, so I don’t know if you’ll be able to assemble the mesh in blender. You might need to use Godot’s tools, but I’m not sure since I only ever work in 3D.

TRAILtheGREAT | 2023-04-27 05:54

Thanks for the pic. Yes my project is in 2D, so I should fine some other way :frowning:

I think @jgodfrey’s words have sparked an idea. First I use a Sprite2D and set its texture to the image I want (after scaling of course). Then I draw over the sprite such that I paint every region except the circle as transparent. This effectively crops the image to circle.

However I’m yet to figure out the math and API methods behind it :smiley:

arun_mani_j | 2023-04-27 17:17

:bust_in_silhouette: Reply From: arun_mani_j

So answering my own question, I solved this by using Polygon2D.

The basic idea is to create a list of points on the circle and map it properly to the image.
Assume, you have an image of whatever size. The first step is to create the array of points.

var polygon_array = PackedVector2Array()
for i in range(361):
    var angle = deg_to_rad(i)
    var point = Vector2(cos(angle), sin(angle)) * RADIUS
    polygon_array.push_back(point)

Now create a Polygon2D and assign the vertices.

var circle = Polygon2D.new()
circle.polygon = polygon_array

If you need a solid color inside the circle, then set the Polygon2D.color attribute.

circle.color = Color.RED

Else, if you need to assign an image to it, then you need to map the UVs. Here it is up to you to decide where the circle is situated inside the image. For example, if your image is 900x900 but your circle is 100 radius, then what region should the circle cover?

In my case, I resized the image to a square of side 2 * RADIUS, so the entire image can be inside the circle. To do this, load the image and resize it.

var image = Image.load_from_file("path/to/image.png")
image.resize(2 * RADIUS, 2 * RADIUS)

Next create the texture and add the image to it.

var texture = ImageTexture()
texture.set_image(image)
circle.texture = texture

Finally, it is time to create the UV points. Again, the list of points depends on how your image should map to the circle. If you, like me, wish to cover the entire image, then continue reading.

The process is same, we create a list of points on the circle AND we shift the circle’s center to the image’s center.

var uv_array = PackedVector2Array()
var uv_center = Vector2(RADIUS, RADIUS)
for i in range(361):
     var angle = deg_to_rad(i)
     var point = Vector2(cos(angle), sin(angle)) * RADIUS
     uv_array.push_back(uv_center + point)
 circle.uv = uv_array

Now you should be having a circular image node.

1 Like